Adding documentation to Cubbles components
To show an example of how the webpack configuration can be modified according to your needs. We will add a documentation page to the elementary using a component called cubx-webpackage-viewer. To aim that, we just need to provide the following input slots:
- manifestUrl: the path of the manifest containing the definition of the component. This path should be according to the final folder structure of the dist folder. In our case, it would be
../manifest.webpackage - componentArtifactId: artifactId of the elementary. Remember that it is composed by the "name" defined in the package.json file and the name folder containing the elementary. In our case, it would be
my-currency-converter
We will add a DOCS.html file to the root folder of the elementary. This file will contain the following code:
<!--
This is the generated documentation for your artifact
-->
<!DOCTYPE html>
<html>
<head>
<meta charset="UTF-8">
<title><<%= elementName %>> generated documentation</title>
<script src="../../cubx.core.rte@3.0.0/webcomponents/custom-elements-es5-adapter.js"></script>
<script src="../../cubx.core.rte@3.0.0/webcomponents/webcomponents-lite.js"></script>
<script src="../../cubx.core.rte@3.0.0/crc-loader/js/main.js" data-crcinit-loadcif="true"></script>
</head>
<body>
<div class="container">
<div class="row">
<h1><<%= elementName %>> generated documentation</h1>
</div>
<div cubx-core-crc class="row">
<cubx-component-docs-viewer cubx-webpackage-id="com.incowia.cubx-webpackage-viewer@2.0.0">
<cubx-core-init style="display:none">
<cubx-core-slot-init slot="manifestUrl">"../manifest.webpackage"</cubx-core-slot-init>
<cubx-core-slot-init slot="componentArtifactId">"<%= elementName %>"</cubx-core-slot-init>
</cubx-core-init>
</cubx-component-docs-viewer>
</div>
</div>
</body>
</html>
Note that we are using a template parameter called <%= elementName %>. This would allow us to always have the correct artifactId (e.g. if we change the name of the package or o the containing folder). For this to work correctly, we should indicate webpack to process this file. To aim that, you should a new entry to the plugins property in the config object in the webpack.subconfig.js file. You should indicate webpack to process the DOCS.html file using the HtmlWebpackPlugin with a templateParameter called elementName as follows:
//...
const config = {
  //...
  module: {
    //...
    plugins: [
      //..
      new HtmlWebpackPlugin({
        template: 'DOCS.html',
        filename: 'DOCS.html',
        // manage placeholders
        templateParameters: {
            elementName: `${elementName}`
          }
      }),
    ]
};
module.exports = config;
Note that you should be familiar with webpack to be able to modify this kind of configuration
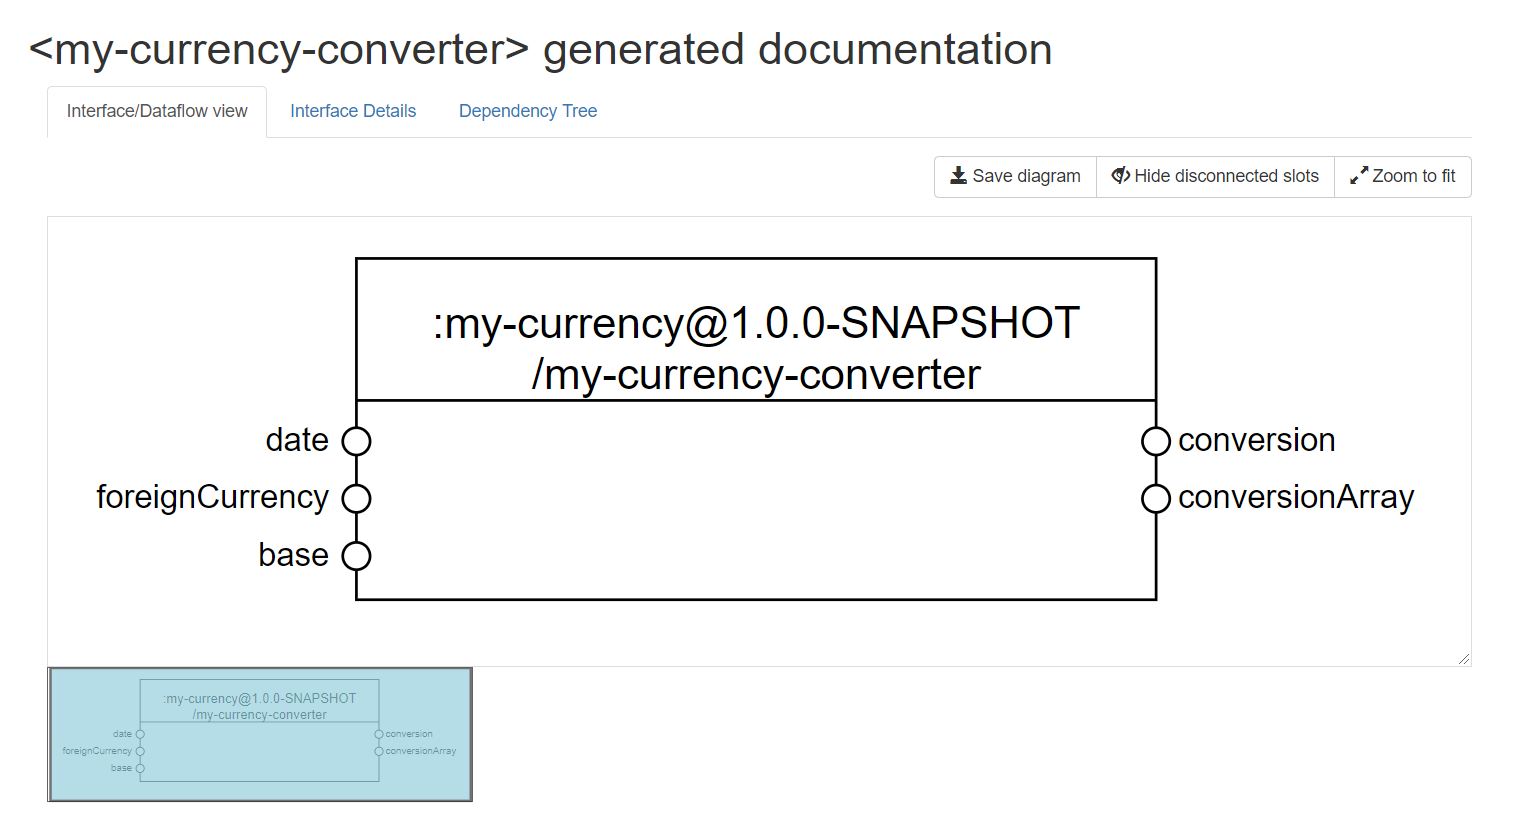
Now, if you run your project (i.e. running the npm run start command) and navigate to the DOCS.html file, you should see something similar to:

Finally, we should add an entry to the runnables array of the artifact manifest file (i.e., Manifest.elementary.js for elementaries and MANIFEST.compound.js for compounds). That will allow us to have a DOCS page available in the base where the artifact is hosted.
const assert = require("assert");

module.exports = webpackageName => {
  assert.ok(webpackageName, 'Expected "webpackageName" to be defined.');
  return {
    //...
    runnables: [
      //...
      {
        name: "DOCS",
        path: "/DOCS.html"
      }
    ],
    //...
  };
};
